
Back-to-School 2026: The International Student Checklist Before You Fly
Jul 31,2026 | Milo
You’ve packed your bags, checked your visa ten times, and said your goodbyes. But there is one thing most new international students forget until they are standing at baggage claim in a foreign country: internet access.
Landing in a new country involves a massive mental load. You are jet-lagged. You are carrying heavy luggage. The last thing you want is to be disconnected while trying to figure out how to get to your dorm.
We call this the "48-hour connectivity gap"—the stressful window between arriving at the airport and finally sorting out your permanent local life.
Before you board your flight for the Fall 2026 semester, here is your digital survival checklist.
Essential Apps Every International Student Should Install Before Flying
Do not wait until you land to download these. Trying to pull a 200MB app over a congested airport Wi-Fi network will only add to your stress. Download them now and set up your accounts.
Google Maps and Apple Maps. Go into Google Maps right now and download the offline map for your specific university city.
Uber is standard in the US and Australia. If you are heading to the UK, add Bolt to your folder. Lyft is also a must-have backup in North America.
Apps like Wise or Revolut are lifesavers for your first few weeks before you manage to open a traditional local bank account.
WhatsApp is non-negotiable for the UK and Australia. If you are going to the US, iMessage and Instagram direct messages dominate student life.
Ensure "Find My" (or Google Find My Device) is active. Save your university’s emergency contact numbers in your phonebook.
The First 48 Hours Abroad: A Connectivity Timeline
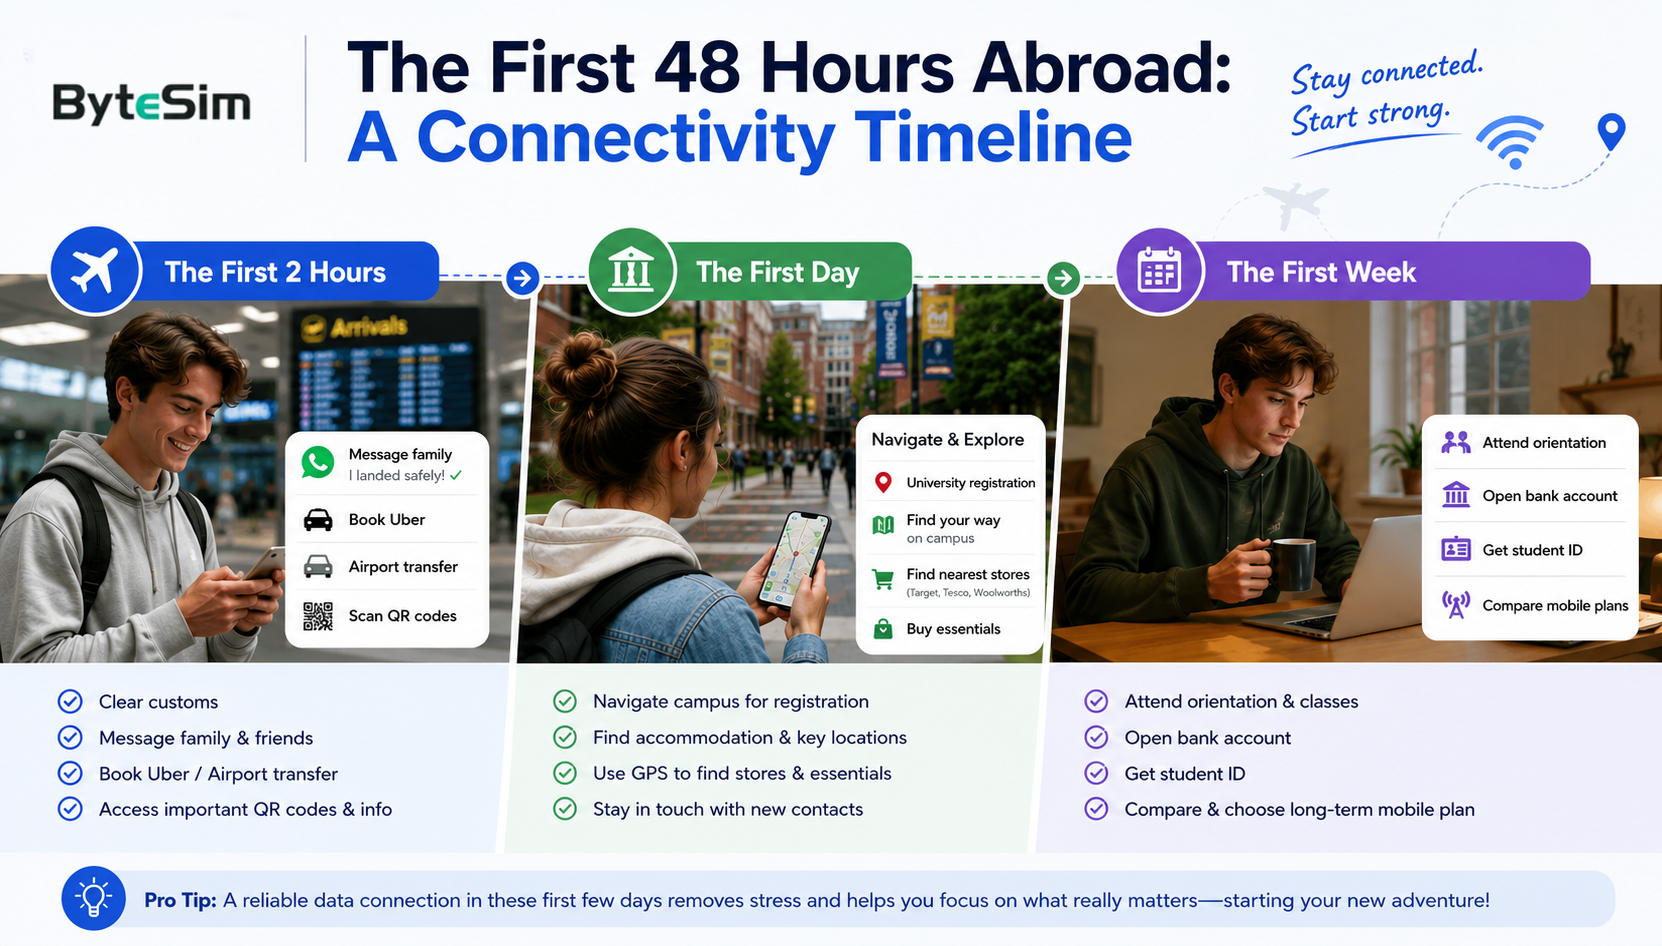
Why is that initial data connection so critical? Let’s look at what exactly happens after you step off the plane.
You clear customs. You immediately need to WhatsApp your family to say "I landed safely." Next, you have to book an Uber or find the specific QR code for your pre-booked airport transfer. All of this requires data.
You arrive at your accommodation. Now you need to navigate an unfamiliar campus for university registration. Later, you'll rely heavily on GPS to find the nearest Target, Tesco, or Woolworths to buy basic groceries and bedding.
This is when you actually start setting up your life. You will attend orientation, open a bank account, get your student ID, and finally, have the time to sit down and compare long-term local mobile plans.
Every Country Has Different SIM Card Rules (Why You Can't Always Get One Immediately)
A common mistake is assuming you can just walk into a local store on day one and walk out with a permanent phone number. Depending on where you study, telecom rules can cause unexpected delays.
Getting a solid postpaid plan here often requires a Social Security Number (SSN) or a US credit history. Since you won't have either, you might be forced into prepaid plans that require complicated auto-pay setups.
While getting a pay-as-you-go SIM is relatively easy in the UK, signing up for a cheaper, long-term contract (SIM-only deal) usually requires proof of a UK address and a local bank account—things you won't have in week one.
Australian law requires identity verification to activate any SIM card. You will need to provide "100 points of ID," which usually means showing your passport, student visa, and a local bank card.
Canadian telecom prices are notoriously high. New students shouldn't rush into a contract at the airport. You need a few days to compare student discount plans from providers like Fido, Rogers, or Bell.
Requirements may vary by carrier and plan. Always check with your chosen mobile provider before signing a contract.
Getting Connected: eSIM vs. Roaming vs. Airport SIMs
So, how do you bridge that 48-hour to one-week gap? You have three main options.
What If Your Phone Doesn't Support eSIM?
Most modern smartphones support eSIM technology, but it is always best to check before purchasing a plan.
Go to Settings → Cellular (or Mobile Data). If you see "Add eSIM" or "Add Cellular Plan," you are good to go.
Go to Settings → Network & Internet. Look for a plus sign (+) next to Mobile Network to add an eSIM.
(Need a detailed check? See our full Compatible Phones List.)
Where to STUDY?
Find the Right eSIM for Your Study Destination
Whether you're heading to the US, UK, Canada, Australia, or beyond, choose a destination-specific eSIM to stay connected from the moment you land.






Instant delivery • Easy setup • 24/7 support
Frequently Asked Questions (FAQs)
Yes. A travel eSIM provides immediate data access. You can use it alongside your home SIM or rely on it completely until you secure a local phone contract.
Because you will be using GPS heavily, downloading university documents, and video calling home, we recommend at least 5GB to 10GB for your first week abroad.
It is generally not recommended due to inflated prices and long queues. Setting up an eSIM beforehand is cheaper and saves time.
Yes. You can keep your home physical SIM in your phone to receive SMS (like bank verification codes) while assigning the travel eSIM to handle all cellular data.
eSIMs are supported in over 200 countries and regions, including all major study abroad destinations like the US, UK, Canada, Australia, and most of Europe.
Conclusion
Your first week abroad is going to be incredibly exciting, but also exhausting. Mobile connectivity shouldn't be another hurdle you have to jump over.
By preparing your digital checklist and securing a temporary data connection before you board, you can walk out of the airport with confidence. Take an Uber, call your parents, and focus on starting your new life.