Cómo obtener un eSIM en India para iPhone: Guía para turistas y locales
Jun 12,2026 | Wang
Cómo obtener un eSIM para tu iPhone en India? El método más rápido depende completamente de tu estado de residencia.
Si eres un local indio o residente a largo plazo que ya posee una tarjeta física de Jio, Airtel o Vi SIM, puedes convertirla a una eSIM de forma gratuita enviando un SMS que contenga los números EID e IMEI de tu dispositivo a tu operador.
Sin embargo, si eres un turista internacional, el mejor método absoluto es comprar un viaje prepago eSIM en línea antes de tu vuelo.
Esto te permite eludir por completo las estrictas leyes de verificación de identidad de India y conectarte a las redes 5G locales en el momento en que aterriza tu avión.
Ya sea que seas un residente local que busca liberar tu espacio físico SIM, o un turista que se dirige al Taj Mahal y necesita datos de inmediato, esta guía te mostrará exactamente cómo conectar tu iPhone.
Método 1: Convertir un físico SIM a un eSIM (Para locales)
Si eres un ciudadano indio con una tarjeta Aadhar, o un expatriado que ya ha navegado con éxito por la intensa burocracia para obtener una tarjeta física SIM de una tienda local, se recomienda encarecidamente convertir esa tarjeta física en una eSIM.
Permite ejecutar dos números simultáneamente o libera tu espacio físico para futuros viajes.
Los tres principales operadores de telecomunicaciones de la India—Reliance Jio, Bharti Airtel y Vi(Vodafone Idea)—todos admiten nativamente la conversión eSIM para dispositivos Apple.
Antes de comenzar el proceso con cualquiera de estos transportistas, debes reunir dos piezas críticas de información de hardware de tu teléfono.
Cómo encontrar el EID y el IMEI de tu iPhone
No puedes iniciar el proceso de conversión de SMS sin conocer los identificadores digitales exactos de tu dispositivo.
- Desbloquea tu iPhone y navega hasta Ajustes.
- Pulsa en General > Acerca de.
- Desplázate hacia abajo hasta que encuentres el número de 32 dígitos etiquetado EID.
- Justo debajo, localiza tu número principal de 15 dígitos.IMEI número.
Consejo: Puedes presionar y mantener estos números para copiarlos directamente en tu portapapeles, así no cometerás un error tipográfico al enviar el SMS.
Pasos de activación de Reliance Jio eSIM
Jio actualmente cuenta con la cobertura de red 5G más amplia en toda India. Su proceso de conversión está altamente automatizado, pero requiere una estricta adherencia al formato de SMS.
- Iniciar la solicitud:
Abre tu aplicación de Mensajes usando tu Jio físico activo SIM. Envía un nuevo SMS al número199.
El mensaje debe tener exactamente este formato:GETESIM .
Asegúrate de que haya un solo espacio entre las palabras y los números.
- Reciba el número virtual:
Si su formato es correcto, Jio responderá en unos minutos con un número virtual de 19 dígitos eSIM y más instrucciones.
- Confirmar la solicitud:
Responda a ese mensaje con el número1Para confirmar que desea continuar.
- Autorización de llamadas IVR:
Poco después de su confirmación por texto, recibirá una llamada automática de voz del servicio al cliente de Jio. Conteste la llamada y presione1en su teclado para dar su consentimiento final.
- Instalar el perfil:
Aproximadamente dos horas después de la llamada telefónica, tu iPhone mostrará una notificación push que dice "Jio Data Plan Ready to be Installed."
Toca la notificación y sigue las indicaciones estándar de iOS para activar el eSIM.
Su físico SIM dejará de funcionar una vez que esto esté completo.
Pasos de activación de Airtel eSIM
El proceso de Airtel es ligeramente diferente, confiando en su dirección de correo electrónico registrada para entregar el código QR de activación de manera segura.
- Activar la solicitud de correo electrónico:
Usando tu Airtel físico SIM, envía un SMS a 121 formateado como:eSIM .
- Confirmación por SMS:
Recibirás un texto de advertencia y confirmación. Debes responder dentro de 60 segundos para validar la solicitud.
- Autorización por voz:
Similar a Jio, Airtel llamará automáticamente a su número. Conteste y siga las indicaciones de voz para confirmar el eSIM intercambio.
- Escanee el código QR:
Abre tu bandeja de entrada de correo electrónico en otro dispositivo (como una laptop o un iPad). Verás un correo electrónico de Airtel que contiene un código QR único.
En tu iPhone, ve a Ajustes > Datos móviles > Agregar eSIM, y usa tu cámara para escanear el código en tu pantalla secundaria.
El perfil tardará aproximadamente dos horas en activarse en la red.
Pasos de activación de Vi (Vodafone Idea) eSIM
Vi ofrece eSIM soporte principalmente en las principales áreas metropolitanas de India. Su proceso refleja la entrega basada en correo electrónico de Airtel.
- Enviar un SMS a199 formateado como:eSIM .
- Espera el texto de confirmación de Vi y responde con la frase exacta.ESIMY.
- Responda la llamada telefónica de verificación automatizada para autorizar la transferencia de red.
- Revisa tu correo electrónico para el código QR de Vi, escanéalo a través de la configuración de celular de tu iPhone y espera unas horas para que el perfil digital reemplace tu tarjeta física.
Las fallas fatales de la ruta oficial: por qué los turistas deberían evitar los quioscos locales
Si lees los pasos anteriores, podrías pensar: "Eso no suena demasiado difícil."
Hay un gran inconveniente: todos esos pasos requieren que ya poseas una tarjeta física india completamente activada y registrada SIM.
Si eres un turista internacional que acaba de aterrizar, intentar pasar por la ruta del transportista local oficial es un agotador ejercicio de paciencia.
Aquí está exactamente lo que enfrentarás si intentas comprar un local SIM en el aeropuerto o en un quiosco de la calle:
- La pesadilla del papeleo
Para cumplir con las leyes KYC, el empleado de la tienda requerirá su pasaporte físico, una fotocopia de su visa india, una fotografía tamaño pasaporte física y los detalles de un residente local indio que actúe como su garante.
Si no conoces a nadie en India, no tienes suerte, o tendrás que pagar al empleado una "propina" alta para usar sus propias credenciales.
- Retrasos de activación masivos
Entregar la documentación no significa que obtenga acceso a internet. Las tarjetas locales SIM para extranjeros deben pasar por una verificación manual en el backend.
Es increíblemente común esperar de 12 a 24 horas antes de que la SIM tarjeta se conecte realmente a internet.
- El bloqueo de SMS de 24 horas (Reglamento del RBI)
Este es el defecto más crítico.
De acuerdo con las estrictas regulaciones contra el fraude establecidas por el Banco de la Reserva de la India (RBI),cada vez que un físico SIM se convierte en un eSIM, todos los mensajes de texto SMS entrantes y salientes están completamente bloqueados durante 24 horas.
Esto significa que si compras una tarjeta local y la conviertes, no podrás recibir ningún Código de Verificación (OTP) para iniciar sesión en tus aplicaciones bancarias, reservar vuelos o verificar tu cuenta de WhatsApp durante todo un día.
Método 2: El código de trampa para turistas (Compra un eSIM en línea)
Debido a que el proceso local es tan hostil para los visitantes a corto plazo, los viajeros modernos astutos utilizan una solución alternativa mucho mejor: comprar un paquete de datos prepago de una plataforma internacional eSIM.
Este método es completamente legal, increíblemente rápido y específicamente diseñado para turistas y viajeros de negocios.
Porque estas plataformas proporcionan perfiles de roaming solo de datos, evitan por completo los requisitos de documentación KYC locales de India.
El proceso es tan simple como reservar una habitación de hotel en línea.
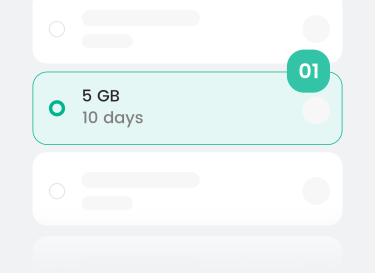
- Compra antes de volar: Mientras estás sentado en tu sofá en casa, navegas por el sitio web de un proveedor eSIM y seleccionas un paquete de datos que se ajusta a tu viaje.
- Omita la verificación de identificación: Paga de forma segura utilizando Apple Pay, PayPal o tu tarjeta de crédito estándar sin necesidad de subir una foto de tu pasaporte.
- Entrega instantánea mediante código QR: En cuestión de segundos después de realizar la compra, llega un correo electrónico a tu bandeja de entrada que contiene un código QR de activación. Lo escaneas con tu iPhone para instalar el perfil inactivo.
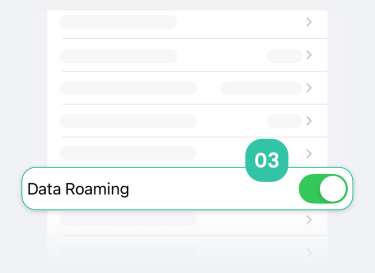
- Conexión automática al aterrizar: Cuando tu avión aterriza en Mumbai o Delhi, apagas el modo avión y enciendes el roaming de datos de eSIM. El eSIM se activa al instante y te proporciona datos de alta velocidad 4G/5G antes de que incluso te desabroches el cinturón de seguridad.

Consejos de expertos: Cómo elegir el viaje perfecto a India eSIM
Comprar un eSIM en línea es sin duda la ruta más inteligente para un visitante, pero el panorama de telecomunicaciones en India es notoriamente fragmentado.
Un dispositivo barato y de bajo nivel eSIM podría funcionar perfectamente en el corazón de Bangalore, pero te dejaría completamente varado con "Sin servicio" cuando viajes a los desiertos de Rajasthan o las playas de Goa.
Si vas a invertir en un viaje eSIM, debes asegurarte de que el proveedor ofrezca características técnicas específicas para garantizar una experiencia fluida:
- Conmutación inteligente de doble red (Jio + Airtel)
No compres un eSIM que te bloquee en una sola red.
Los mejores proveedores ofrecen perfiles que se alternan sin problemas entre Reliance Jio y Bharti Airtel.
Si la torre de Jio está congestionada cerca de un monumento turístico, tu iPhone debería cambiar automáticamente a la torre de Airtel para mantener tu Google Maps funcionando sin problemas.
- Direcciones IP nativas sin restricciones
Los proveedores de servicios de internet en India a veces limitan o bloquean las llamadas VoIP (como las llamadas de voz de WhatsApp) o marcan aplicaciones bancarias extranjeras.
Un viaje premium eSIM dirige tu tráfico a través de direcciones limpias y sin restricciones IP, asegurando que todas tus aplicaciones internacionales funcionen exactamente como lo hacen en casa sin activar alarmas de seguridad.
- Niveles de datos flexibles
Ya sea que estés realizando una rápida corporación de tres días o un viaje de mochilero de un mes, deberías buscar un proveedor que ofrezca planes detallados día a día o verdaderas opciones ilimitadas para que nunca tengas que preocuparte por recargar en medio de un viaje.
Comparación Directa: Travel eSIM vs. Local Carrier eSIM
Para que su decisión sea lo más clara posible, hemos desglosado exactamente cómo el método de plataforma en línea se compara con la ruta del transportista local tradicional para un usuario de iPhone.
| Función (para usuarios de iPhone) | Plataforma de viajes internacionales eSIM | Operador local eSIM (Jio/Airtel) |
|---|---|---|
| Facilidad de adquisición | ⭐⭐⭐⭐⭐ Con solo unos clics en línea desde cualquier lugar | ⭐ Requiere visitar una tienda física. |
| Verificación de identidad (KYC) | No se requiere No se permiten cargas de pasaporte | Extremadamente estricto Pasaporte, visa, fotos, aval local |
| Cobertura de red | Red dual Cambia automáticamente entre Jio y Airtel. | Bloqueado a una sola red Jio o Airtel |
| Velocidad de activación | Instante Se conecta en el momento en que aterrizas | Retraso en la aprobación manual de 12 a 24 horas |
| Restricciones de SMS/OTP | Ninguno Reciba de forma segura los códigos OTP de su banco. | Congelamiento de SMS durante 24 horas Obligatorio por ley |
| Inclusiones del plan | Solo datos de alta velocidad Perfecto para WhatsApp, Uber y Maps. | Datos + Voz local + Número de teléfono indio |
| Más adecuado para | Turistas, nómadas digitales, viajeros de negocios a corto plazo | Expatriados y residentes que alquilan apartamentos a largo plazo |
Si te mudas a India por seis meses y necesitas absolutamente un número de teléfono local +91 para abrir una cuenta bancaria, debes soportar el proceso del operador local.
Pero si estás de visita por vacaciones y dependes de aplicaciones que consumen muchos datos para navegar por el país, comprar un Viajes a India eSIM internet es la mejor salvación para la cordura.
La verificación de hardware crucial: ¿está desbloqueado tu iPhone?
Antes de apresurarte a comprar un perfil de viaje internacional, debes realizar una verificación de hardware vital para asegurarte de que tu iPhone sea realmente capaz de utilizar redes de terceros.
Muchos viajeros, particularmente aquellos de los Estados Unidos, el Reino Unido o Japón, compran sus iPhones a través de planes de pago mensual subsidiados por su operador de telecomunicaciones en casa (como AT&T, T-Mobile o EE).
Cuando compras un teléfono de esta manera, el operador a menudo coloca un bloqueo de software en la placa base del dispositivo, impidiendo que interactúe con cualquier otra red en el mundo.
Para verificar su estado, vaya a Configuración > General > Acerca de en tu iPhone. Desplázate hacia abajo hasta que veas el campo etiquetadoCandado de portador(o bloqueo del proveedor de red).
- Si dice"Sin restricciones SIM",su dispositivo está completamente desbloqueado. Está listo para comprar e instalar cualquier perfil de viaje indio que desee.
- Si ves el nombre de una compañía de telecomunicaciones específica listado allí, tu iPhone está bloqueado. No podrás activar un viaje eSIM, y debes contactar a tu operador de origen para solicitar un desbloqueo antes de tu vuelo a India.
Conclusión: Sus próximos pasos
En una era donde nuestros teléfonos inteligentes actúan como nuestros mapas, billeteras y traductores, asegurar que tengas una conexión a internet sólida en un país extranjero es la parte más importante de tu preparación para el viaje.
Para los locales y expatriados que residen en India, tomarse el tiempo para convertir un Jio o Airtel físico SIM en un perfil digital a través de SMS es una forma fantástica de aprovechar al máximo las avanzadas capacidades duales del iPhone SIM.
Se necesita un poco de paciencia, pero la conveniencia a largo plazo vale la pena.
Para el viajero internacional, sin embargo, su tiempo es demasiado valioso para gastarlo llenando formularios en una terminal de aeropuerto abarrotada.
Al aprovechar una plataforma internacional eSIM, evitas por completo los obstáculos burocráticos.
Aseguras una conectividad de alta velocidad y de doble red antes de que incluso empaques tus maletas, lo que te permite salir del aeropuerto y entrar directamente en la magia de India.
Si su itinerario de viaje se extiende más allá de las fronteras de India, y planea visitar centros vecinos como Dubái, Singapur o Tailandia, gestionar múltiples perfiles de un solo país puede volverse tedioso.
Le recomendamos encarecidamente que lea nuestro Guía para viajes multicountry en Asia eSIMs para encontrar el mejor eSIM para tu viaje.
No dejes que la falta de internet arruine tu viaje de toda la vida. Organiza tu conectividad digital en minutos y concéntrate en explorar los increíbles paisajes y sonidos de India.

Comentario